 Phinsh
Photo Wall Ideas: 25 Ways to Display Your Pictures
Ideas for a wall with photos in every room: gallery grids, ledges, frame-free layouts and one big shaped collage, plus gaps, print sizes and hanging tips.
Key takeaways
- A classic photo wall is a gallery of frames: an even grid, a mixed-size cluster, three in a row, a ledge or a staircase run. Leave 2 to 3 inches between frames and keep the group to about two-thirds of the width of the furniture below it.
- You do not need frames. Clips on a cord, tape, wooden poster hangers and a pinboard all work and cost little.
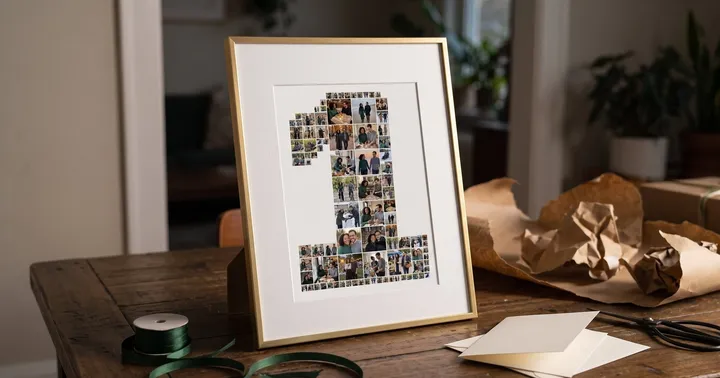
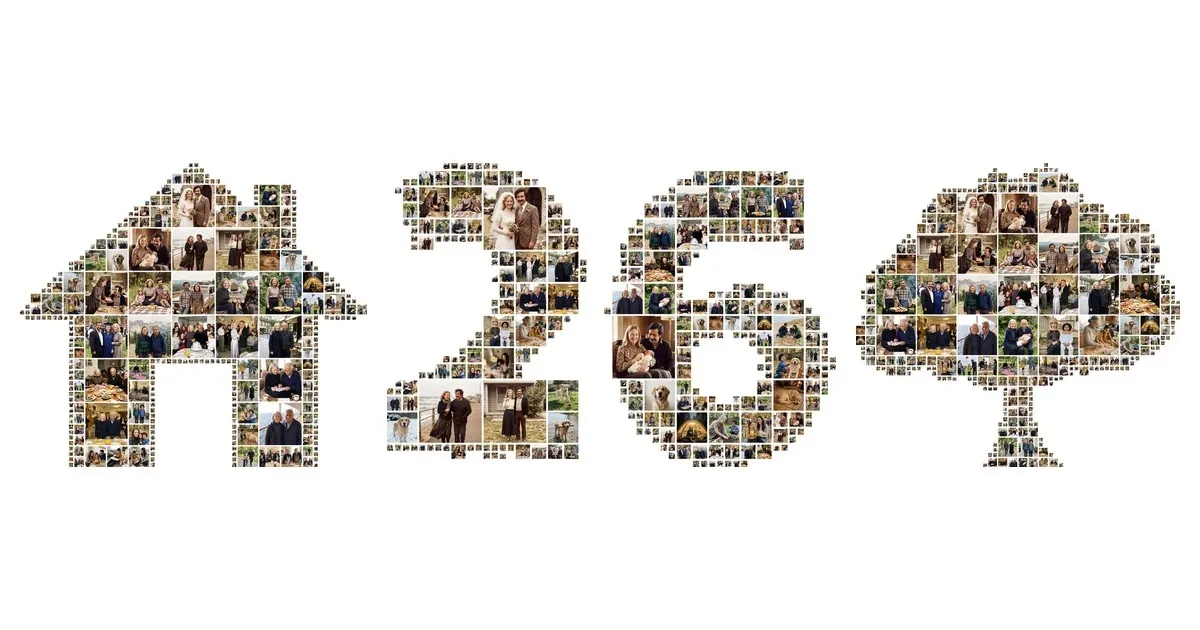
- The one-piece alternative is a single shaped collage, such as a house, a year or a tree, printed once and hung as one picture.
- A 3000px Phinsh export prints about 20 inches (51 cm) on its long side at 150 ppi; a 6000px export prints about 40 inches (102 cm).
In this article
There are two ways to put photos on a wall: many small pictures arranged as a gallery, or one large piece that holds all the photos at once. Below are 25 photo wall ideas, grouped by how you hang them and where they go, with the gaps, print sizes and hanging rules that make each one work.
The collages in this guide are real Phinsh collages.
Ideas for a wall with photos: 25 ways to display your pictures
Frames on the wall
1. An even grid
Same frame size, same gaps, rows and columns lined up. A 2×3 or 3×3 grid looks tidy in a hallway or above a desk, and it suits photos that already match, such as all black and white or all portraits.
2. A mixed-size gallery wall
One large frame as the anchor, smaller ones around it. Different sizes give a collected look, and a family wall like this can grow as you add pictures. Keep one thing the same, such as the frame colour or the mat, so it does not look random.
3. Three in a row
Three equal frames or canvases with a small gap suit a narrow wall or the space above a headboard. Landscape photos usually work better than portraits here, and three related photos read as one set.
4. A group above the sofa
Hang the group above the furniture so it reads as part of it. A common guide is to let the group span about two-thirds of the sofa’s width, and a single large piece should be no wider than the furniture under it.
5. A staircase wall
Follow the angle of the stairs: step the frames up in a diagonal, or line the bottom edges up with the rail. People walk past a staircase wall slowly, so it suits a family picture wall.
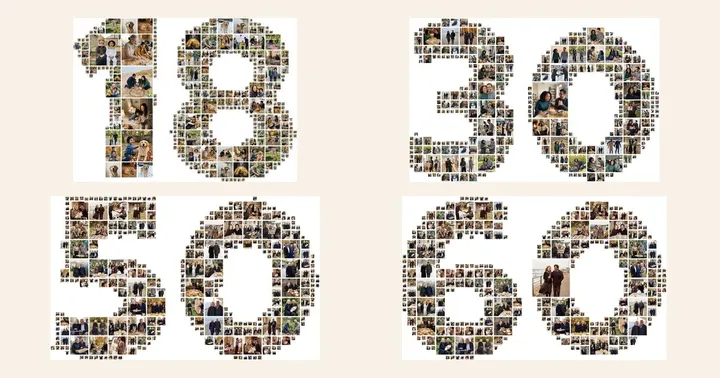
Shelves, ledges and tables
6. Picture ledges
A narrow shelf with a lip holds frames without a nail behind each one. You can swap a photo in seconds, overlap frames and lean a mirror or a print into the mix. One long ledge looks calmer than five short ones.
7. Floating shelves with books and plants
Mix two or three frames with a vase, a stack of books and a plant. Pictures on a shelf read as part of the room.
8. A mantel or console table
Lean larger frames against the wall at the back and put small ones in front. Groups of three or five usually look more natural than pairs.
9. A sideboard or desk display
Easel frames and a few prints in a stand sit on a sideboard or desk and need no hanging at all, which suits a rented room.
Frames not needed
10. String and clips
Run a cord or fairy lights between two hooks and clip prints to it with pegs or mini clips. Change the prints whenever you like.
11. A tape grid
Stick prints up with decorative tape in a tidy grid or a loose scatter. It costs almost nothing, which makes it a good first photo wall for a teenager’s room.
12. Wooden hangers and poster rails
Two thin wooden rails hold a poster or a large print by the top and bottom edges. Hang a big print this way and it needs no frame.
13. A pinboard or cork board
A board turns a small wall into a collection that changes: tickets, postcards and prints go on and come off without more holes in the wall.
14. Prints as wallpaper
Cover one small wall, or the wall beside a desk, with many small prints in a tight grid. It works best with a single colour theme or only black and white.
Walls with a story
15. An entryway wall
The wall by the front door is the first one visitors see. Put the family’s favourite portraits here, or one large collage such as the year in photos, for example the last two digits of the year.


16. Around the TV
The blank wall behind and around a television can carry a grid of frames. Pick photos that are not too bright so they do not compete with the screen.
17. Above the bed
Hang a single piece or a row of three above the headboard, centred on the bed. Photos of the two of you, or a tree filled with the whole family, make a calm bedroom wall.

18. A timeline wall for a child
One photo per year in a row from left to right, so the wall grows with the child. Use the same frame every year and add one each birthday.
19. A trip wall
Hang the photos from one journey together, or fill a map shape with them. Phinsh has map shapes for many countries and for the whole world, so a year of travel can go into one globe or one country.
20. A family picture wall
Choose one place, such as the hall or the stairs, and keep the family photos there, from several generations if you have them. Include one or two photos with everyone in the frame and leave a gap or two for photos you have not taken yet.
One big piece instead of many frames
21. One oversized print
A single large poster or canvas gives the wall one focal point instead of ten small ones. It also means one frame to buy and one nail to hammer.
22. A house collage
A house shape filled with photos of the home, the move and the first dinner makes one piece of wall art from dozens of photos. It fits above a sofa or a sideboard, and Phinsh packs the photos into the shape for you.


23. A year or an age in a number
Fill the last two digits of the year, or a birthday number, with that year’s photos and hang it in the hall. It reads from across the room, and a new one each January becomes a small tradition. For more number layouts, see our number collage guide.
24. A family tree shape
A tree filled with photos of everyone, with the grandparents low in the trunk and the youngest at the top. It is the one-piece version of a family picture wall.

25. A small gallery of shape collages
Instead of one big print, hang three smaller shape collages together, for example a heart, an initial and a number, or a star like this one. Our photo collage ideas show this layout in a room.

Six layouts at a glance

The first four need frames and some measuring. String and clips need two hooks and a few minutes. The shaped collage needs one print and one frame, or none.
How to hang a photo wall: five rules
- Plan on the floor first. Lay the frames out on the floor or the bed and photograph the layout before you touch the wall.
- Leave 2 to 3 inches between frames. Shutterfly’s gallery wall guide gives that gap, and an even gap makes a mixed wall look planned.
- Match the furniture. Keep the group to about two-thirds of the width of the sofa or console below it, and never wider.
- Hang at eye level. Shutterfly’s photo wall guide says to hang pictures at eye level and, for a smaller collage, to keep its centre at that height.
- Use paper templates. Cut paper to each frame’s size, tape it up and move the paper until you like it. Then hammer the nails through the paper.
Wall collage ideas without frames
Ideas 10 to 14 above need no frame. The easiest no-frame wall of all is one large collage: print it on poster paper with a white border and clamp it between two wooden rails, so there is nothing to buy but the rails. Tape works too if you check that it is safe for your paint. For more shapes to start from, browse the shape collages gallery.

What size should you print a wall collage?
Phinsh does not print. You export an image and take it to any print shop or online print service. The export size is the number of pixels on the longer side, and the printed size depends on the pixels per inch (ppi) you choose.
The table shows how large each export can print at three ppi values. 300 ppi is a common target for pictures seen from arm’s length, and 150 ppi a common lower limit for large prints seen from a distance. We worked these out from pixels divided by ppi, so check your print shop’s own guidance too.
| Phinsh export (longer side) | At 300 ppi | At 200 ppi | At 150 ppi |
|---|---|---|---|
| Standard, 1500px | 5 in (12.7 cm) | 7.5 in (19 cm) | 10 in (25 cm) |
| High, 3000px | 10 in (25 cm) | 15 in (38 cm) | 20 in (51 cm) |
| Ultra High, 6000px | 20 in (51 cm) | 30 in (76 cm) | 40 in (102 cm) |
| Super UHD, 12000px (web app) | 40 in (102 cm) | 60 in (152 cm) | 80 in (203 cm) |
For a standard paper size, a 3000px file printed at A3 (about 16.5 in on the long side) comes to about 180 ppi. A 6000px file printed at 50×70 cm comes to about 218 ppi.
Phinsh describes its 3000px export as meant for papers up to A3 and 6000px as meant for large prints or a framed picture. The free Standard export is 1500px. 3000px comes with PRO, and 6000px and 12000px are separate purchases. The mobile apps go up to 6000px; the 12000px export is available in the web app, for very large prints. A collage holds many small photos, so a higher export lets each photo keep more detail.
How to make a one-piece wall collage with Phinsh
- Open Phinsh in your browser, or on iPhone or Android where you tap START, and add your photos. About 40 to 60 fill a house or a tree well, and there is no limit.
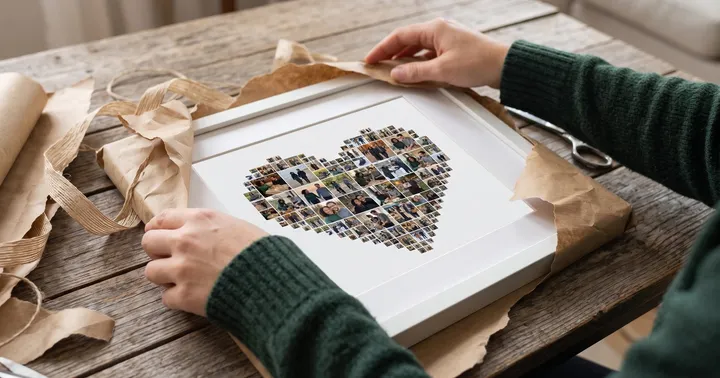
- The first collage is a heart. Open Shape to pick a house or a tree, or Text to type a number or a short name.
- Adjust photo size and spacing until the outline is clear, and swap any photo that landed badly.
- Export at the size your wall needs and upload the image to a print shop.
- Frame it with a wide white mat, or hang it from a poster rail.
For a quick start, see the heart shape collage in a minute, how to fit 100 photos in one frame and the shape photo collage art guide. For a bedroom wall, read how to display wedding photos in a bedroom, and for what else a collage can be printed on, see our photo collage gift ideas.
Frequently asked questions
How do you arrange pictures on a wall?
Pick one layout first: an even grid, a mixed-size cluster around one big frame, a single row or a ledge. Cut paper templates, tape them to the wall, move them until the group looks right, then hang the real frames. Keep 2 to 3 inches between pictures and centre the group on the furniture below it.
How do you display photos without frames?
Clip prints to a cord or wooden hanger, stick them up with tape, pin them to a cork board or hang one large print from a poster rail. A single big collage printed on poster paper and hung from two rails needs no frame at all.
How many photos do you need for a photo wall?
A frame grid needs as many photos as frames, usually 6 to 12. A shaped collage needs more so the outline reads clearly: about 40 to 60 photos for a house or a tree, and more for a large poster. Phinsh has no photo limit.
What size should I print a wall collage?
Print it as large as your wall and your file allow. A 3000px export gives about 10 inches on the long side at 300 ppi and 20 inches at 150 ppi. A 6000px export gives 20 inches at 300 ppi and 40 inches at 150 ppi. A 12000px export, available in the Phinsh web app, doubles those sizes. Ask your print shop which ppi it recommends.
Can you make a photo wall with one picture instead of many?
Yes. A collage app can pack dozens of photos into one shape, such as a heart, a house or a number, and you print and hang that single image. It hangs like one piece of art and holds dozens of photos.
How do you hang family photos on a wall?
Choose one place, such as the hall or the stairs, and keep the family photos together there. Mix group photos with portraits, keep the same gap between frames, and leave a gap or two for photos you have not taken yet. For a lighter look, hang one large family collage instead of many frames.